When we had left off, The Mister had primed and painted the ceiling, walls, and trim in the kitchen and dining rooms.
 |
Kitchen and dining primed and painted.
Still need to install baseboards and crown molding |
As mentioned in
Part One of our Kitchen/Dining Renovation, we discovered that there were two different floor types adjacent to one another. The kitchen had pine flooring and the dining room had oak. Add onto that the hole that was left by removing the wall and this room was quite a challenge. Before making a decision, we tossed around combinations of ideas.
- Tiling the kitchen only
- Pros: We would be tiling directly over the old vinyl flooring and it would give us a continuous look from the laundry to the kitchen area. Tile would also be relatively easy to clean.
- Cons: It would section off the kitchen from the dining space giving it a distinct delineated space. We really wanted these two rooms to flow together. It would also produce a "lip" from the dining to the kitchen - a possible tripping hazard while carrying trays of food?
- Tiling both the kitchen and dining room
- Pros: It would give us a continuous look from the kitchen and dining space. Tile would also be relatively easy to clean in an area that would encounter a lot of food droppage.
- Cons: It would be a lot of tile (a lot of labor from us) and we would be covering oak flooring. We would also have a "lip" from the living room to the dining room and from the dining room to the hallway.
- Remove the pine boards and replace with oak
- Pros: The wood would look continuous.
- Cons: Pricey for us.
- Leave both the pine and oak boards
- Pros: Work with what we have. Won't have to buy extra tile (or extra labor for us to install the tile). Much of the space will be covered by appliances and furniture.
- Cons: The board widths and grains would be different. The unknown factor: Would there be a noticeable difference?
 |
| On the left is the strip of missing boards where the wall between the dining and kitchen was located. The hole on the bottom left was where the old waterline came through to feed the ice maker. |
In the end, we decided to go with option 4 and leave the pine and oak boards. Our floor installer was fabulous. He was a wealth of knowledge and had been installing and refinishing floors for decades. After the floor installer patched the hole and refinished the floor, one can hardly tell the difference between the two types of wood unless one was looking closely. We were and continue to be thrilled to have had that installer and are so pleased to have selected the continuous wood look into the kitchen area.
 |
This is after the flooring guys sanded and patched the floor.
The oak flooring is on the left and the pine flooring is on the right. |
 |
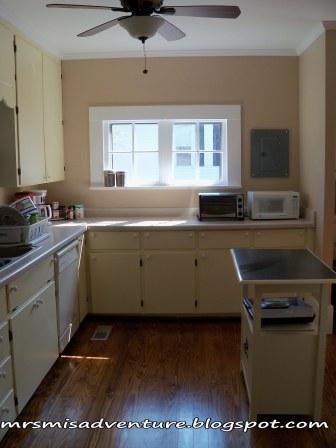
| Move in day before we added furniture and appliances. |
After we moved into the house, The Mister installed the baseboards and crown molding in these rooms. He also installed trim around the window in the kitchen. We really enjoy the open space and the morning light pours into the rooms - another aspect I really like. Now for my favorite part - the befores and afters (in progress) pictures.
 |
| Before and In progress view of the Dining Room/Kitchen from the Living room |
 |
| After (In Progress) of the Dining Room from the Hallway |
 |
| Before of the Kitchen from the Laundry room |
 |
| After (In Progress) of the Kitchen from the Laundry room |


No comments:
Post a Comment